When my twins were little, one of our favorite things to do in the summer was head to this quiet, woodsy park just down the road from our house.
We’d pack a little bag of snacks, bug spray, and magnifying glasses, and just wander.
They were curious about everything.
Tiny bugs on tree bark, weird-looking mushrooms, smooth rocks, bird calls—all of it felt like a new adventure.
I didn’t plan fancy activities or crafts.
I just let them explore. And honestly?
Those simple nature walks gave us the best memories (and tired them out by nap time, which was a bonus).
If you’re looking for nature-inspired summer activities for your own kids that are actually fun, and don’t require a trip to the craft store, here are a few ideas we’ve loved over the years.
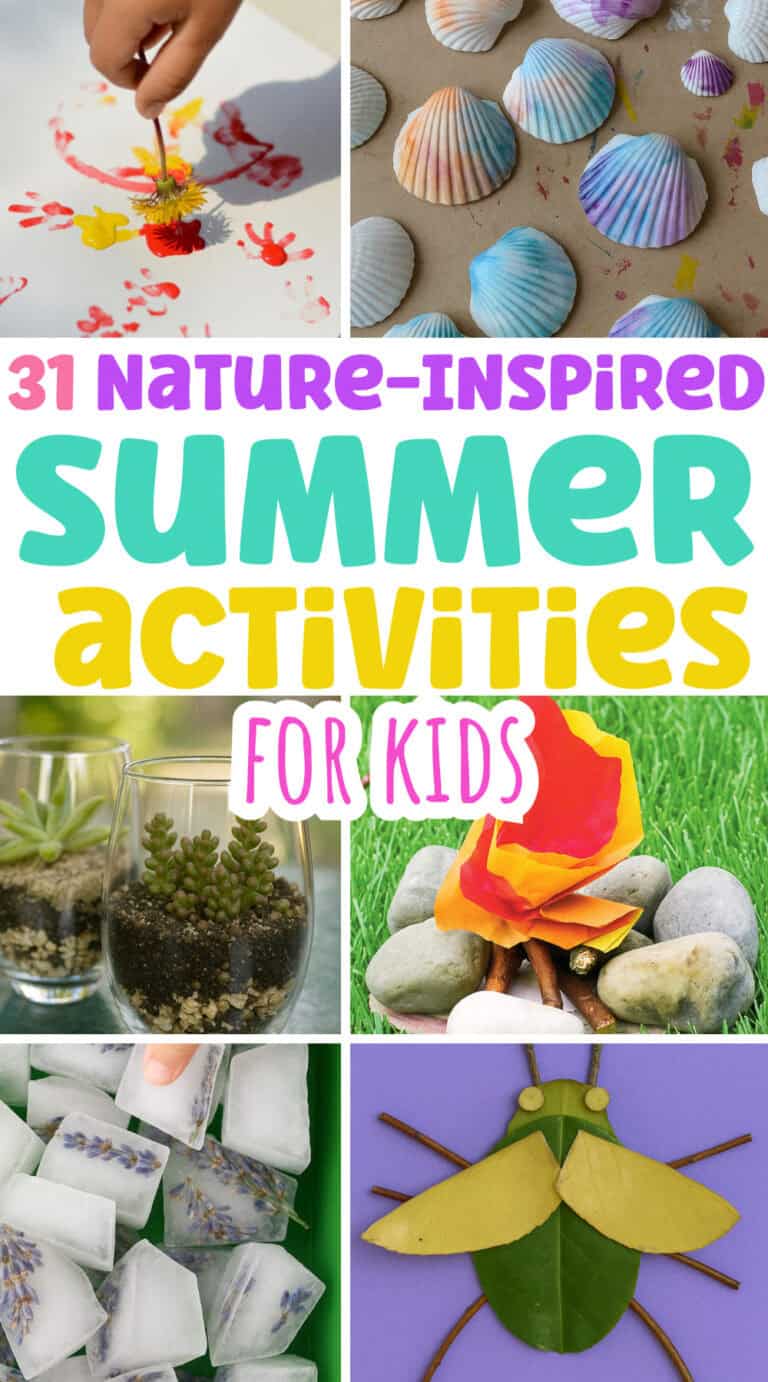
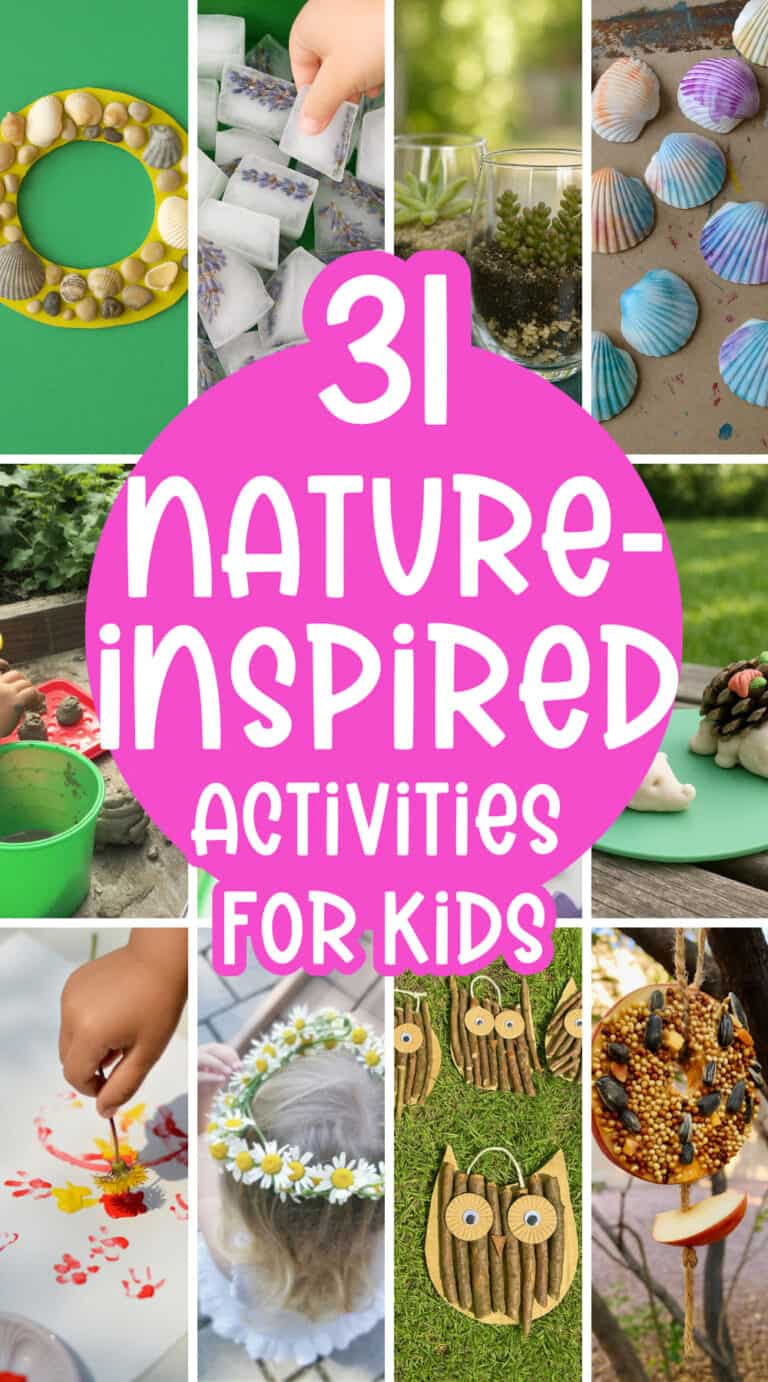
Nature-Inspired Summer Activities for Kids
If you’re looking for easy ways to keep your kids busy this summer, nature has you covered. These outdoor activities are fun, low-prep, and perfect for getting everyone off screens and into the sunshine.
1. Pine Cone Hedgehog Activity

Here’s a simple step-by-step guide for making Pine Cone Hedgehogs using salt dough and natural materials, perfect for a fun summer craft day!
Materials:
- Pine cones
- Homemade salt dough (recipe below)
- Food coloring (optional – for decorating with leaves)
- Pencil or knife (for details)
- Oven (or let it air dry)
Make Your Own Salt Dough:
You’ll need:
- 2 cups flour
- 1 cup salt
- Up to 1 cup water
- (Optional) Food coloring
Instructions:
- In a bowl, mix the flour and salt together.
- Slowly add water a little at a time, kneading until you get a smooth dough.
- If you want colorful details like leaves, divide your dough and add a few drops of food coloring before shaping.
Craft Steps:
- Prepare your pine cone:
Find one that looks like hedgehog spikes – flat and open is best. - Make the hedgehog face and feet:
Use your salt dough to shape a rounded snout for the face, and small rounded shapes for the feet. Press them gently into place around the pine cone. - Add details:
Use a pencil or knife to mark eyes, a mouth, or nostrils on the face. You can also shape tiny dough leaves and color them for a fall touch. - Let it dry:
- Air dry for a couple of days, flipping to dry evenly.
- Or bake at a low heat (around 200°F or 90°C) for a couple of hours until hardened.
- Display:
Once your hedgehog is dry, display it on a shelf, or add it to your nature table for fall.
2. Twig Owl Craft
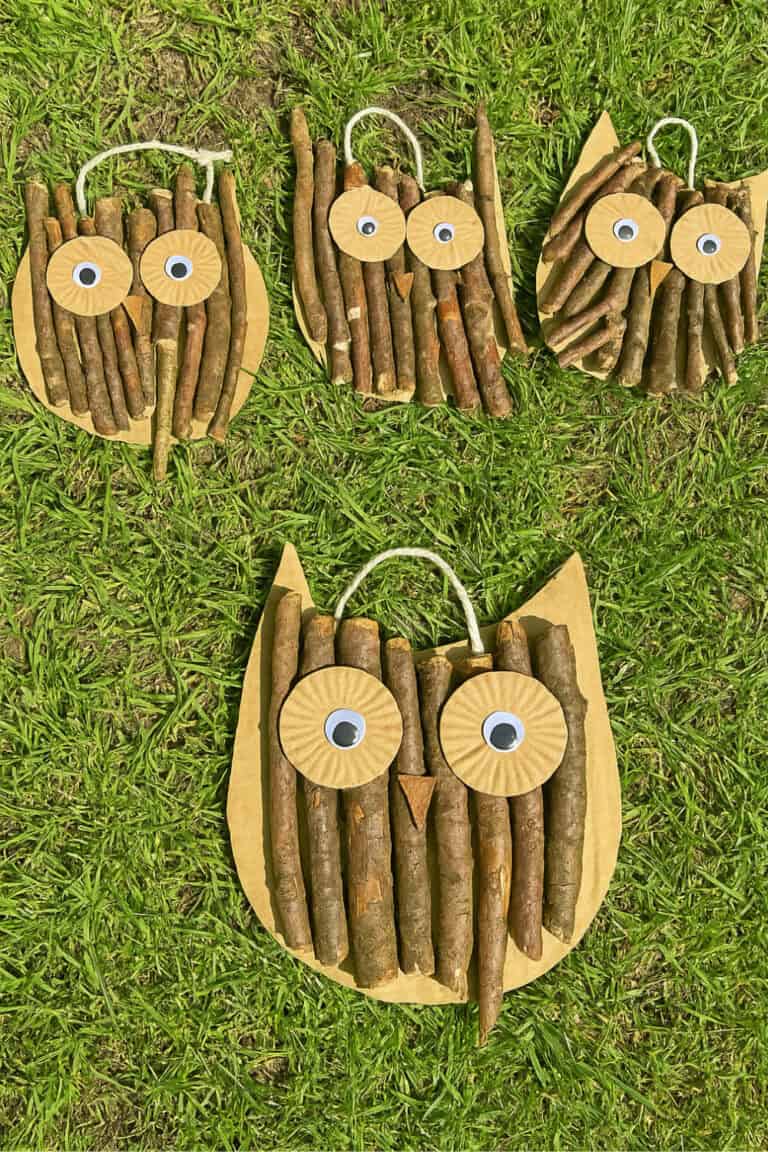
Here’s how you can make these adorable and cute Stick Owls, a sweet outdoor craft that blends nature collecting with creative hands-on fun.
This activity is perfect for little ones and takes a few days to complete, making it a great slow-paced project for a sunny week.
Make Your Own Twig Owl Craft:
- Straight sticks or twigs (collected on a nature walk)
- Cardboard (we reused an old delivery box)
- Scissors
- Pencil
- White glue (PVA glue)
- Circular object (like a plastic Easter egg) for tracing eyes
- Scrap paper (to create an owl template)
- String or yarn (for hanging)
- Googly eyes (or paper circles)
Instructions:
- Go on a nature walk!
Let the kids collect all kinds of sticks. Don’t worry if some are bendy or twisty—they’ll quickly learn which ones work best for crafting. The straight sticks will be easiest to glue down securely. - Make your owl shape:
Fold a sheet of paper in half and draw half of an owl shape. Cut it out and unfold it for a perfectly symmetrical owl. Trace it onto cardboard and cut out as many owl bodies as you want. - Prep for hanging:
Before adding any sticks, punch a hole at the top of the cardboard. This is much easier to do before the owl is covered in glue and sticks. - Glue the sticks:
Let the kids apply a generous amount of PVA glue onto the cardboard owl. Arrange straight sticks to fill the body, trimming if necessary. You’ll need to let this layer dry fully—ours took about 3 days to complete, as we worked in stages. - Add the eyes:
Trace around a small round object (like a plastic egg) onto cardboard to make the eyes. Add googly eyes or draw on your own, then glue them on once the sticks have dried. - Hang them up:
Thread a string through the top hole and hang the owls in a tree or on a porch. They look adorable swaying in the breeze!
3. Nature Collage
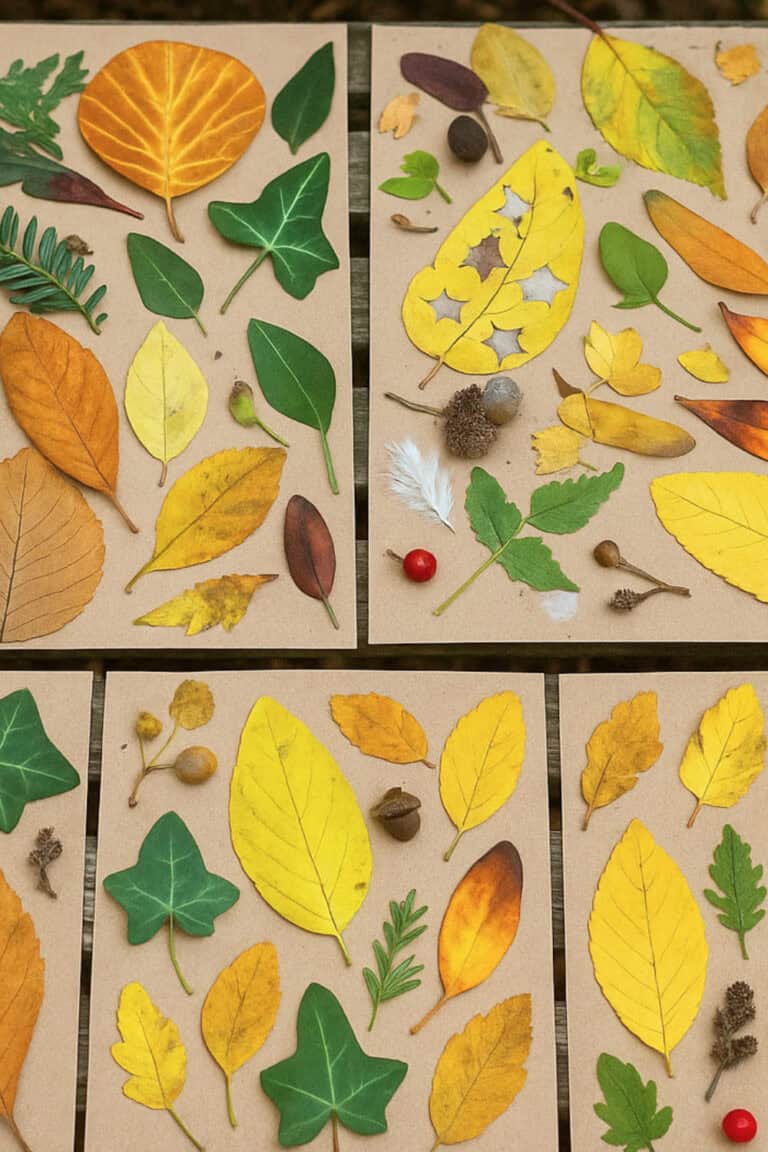
If you’re heading to the forest this summer, this is the perfect hands-on activity to bring along.
It turns a simple walk into an adventure where your kids can explore, collect, and create.
You’ll end up with beautiful, one-of-a-kind nature boards that capture the colors and textures of the season.
Materials:
- Cardboard (cut into small boards, one per child)
- Double-sided sticky tape
- Child-safe scissors (one per child)
- A shape hole punch (optional)
- A small bag or basket for collecting nature finds
- A mix of fresh and dry leaves, petals, twigs, feathers, etc.
Steps:
- Prep the Boards:
Before you head out, cut pieces of cardboard into manageable sizes—one for each child. Stick strips of double-sided tape across each board so they’re ready to go once you’re outside. - Pack Your Supplies:
Give each child their own pair of scissors so they can help cut tape or trim leaves. If you have a hole punch with fun shapes, bring that too—it adds a creative twist. - Go Explore and Collect:
Let your kids wander the forest path and collect anything that catches their eye—dry leaves, fresh green ones, feathers, petals, tiny pinecones, or even textured bark. - Create on the Spot:
As they find treasures, they can press them right onto the tape. Some kids might want to create patterns or themes, while others just love sticking as they go. - Make It Meaningful:
Encourage your kids to use the shape punch or scissors to create stars, hearts, or shapes with their leaves. One fun idea is to “leave a trail” of cut shapes behind for other kids to spot. - Take Breaks and Display:
If you stop for a rest or snack (or to feed ducks like we did!), prop the boards on a bench or log. They’ll look beautiful filled with all the natural textures and colors.
4. Apple Bird Feeder
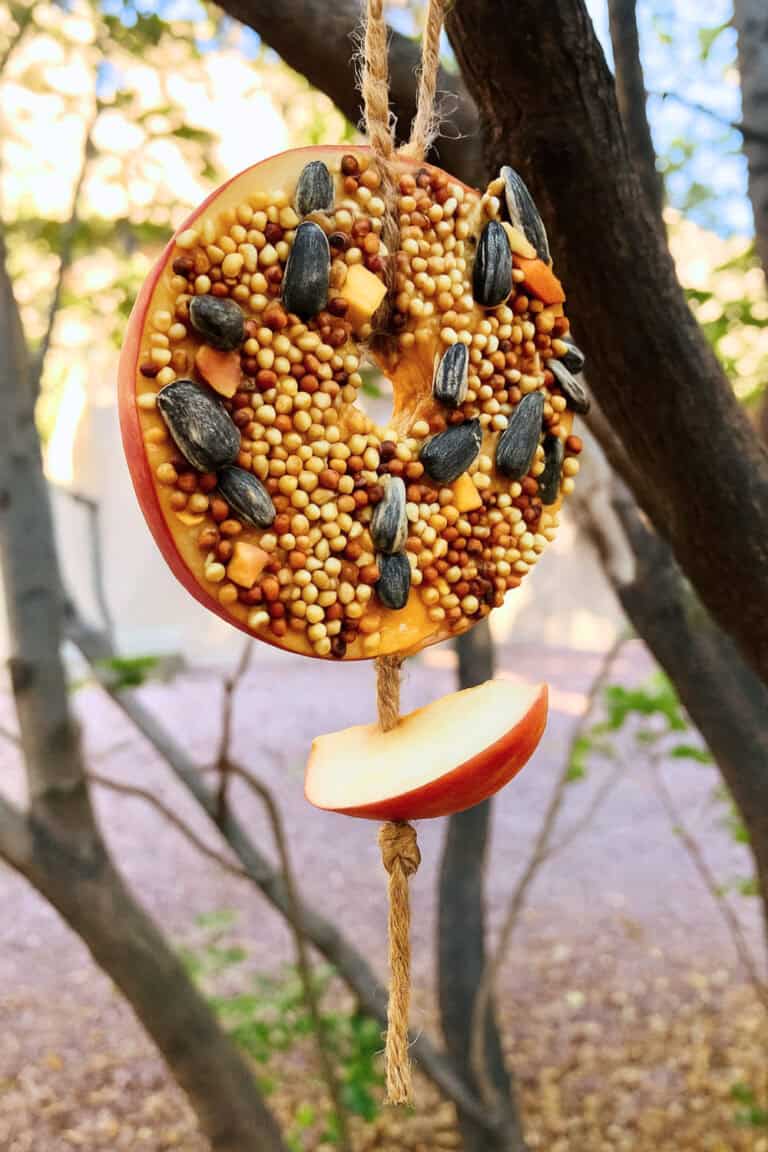
Looking for a fun, quick, and bird-friendly nature craft? This apple bird feeder is an easy summer activity you can do right in your backyard or after a forest walk.
Kids and preschoolers will love making it and even more so watching the birds come enjoy their treat!
Materials:
- 1 apple (or more, if making multiples)
- Birdseed
- Peanut butter
- Jute cord or natural string
- 1 straw (for poking holes)
Steps:
1. Prep your supplies
Clean your apple, get your birdseed and peanut butter ready, and lay everything out on a clean surface. Cut your jute cord into pieces long enough to hang from a branch.
2. Slice the apple
Slice your apple horizontally into round, donut-like rings. Each slice will become a little feeder. Using a straw, poke a hole through the center of each slice (this is where your string will go).
3. Spread the peanut butter
Use a butter knife or spoon to spread a thin layer of peanut butter over each apple slice. This will act as the “glue” for your birdseed.
4. Coat with birdseed
Press the peanut butter-covered side of each apple slice into a bowl or plate of birdseed. Make sure it gets fully coated—sunflower seeds, millet, and cracked corn all work well.
5. String it up
Thread your jute cord through the hole in each apple slice. You can hang them one by one, or add two or three slices to one string for a stacked look. If you’d like, tie an extra apple slice at the bottom for weight.
6. Hang and enjoy
Find a tree branch or a place in your yard where birds like to visit and hang your feeder. Now just wait and watch—your local birds will love it!
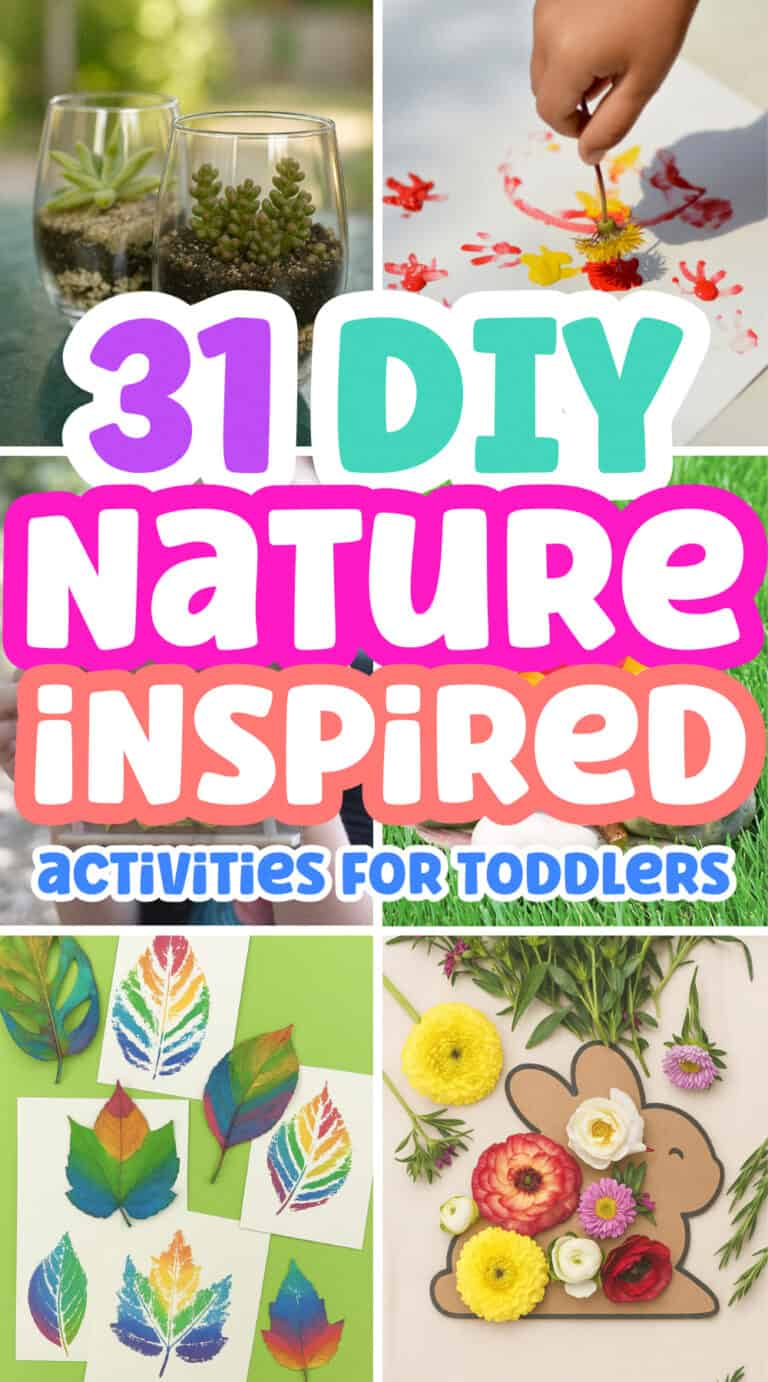
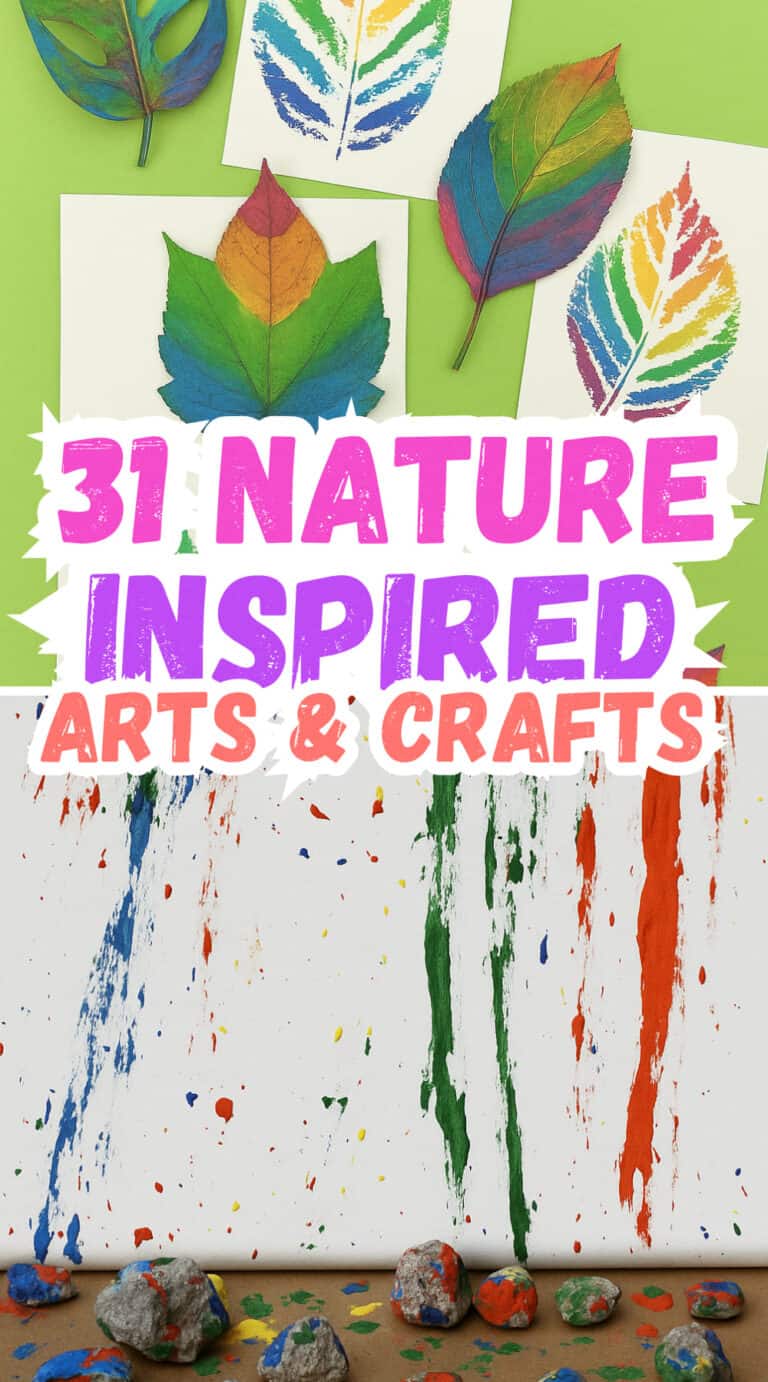
5. Painted Leaf Summer Activity
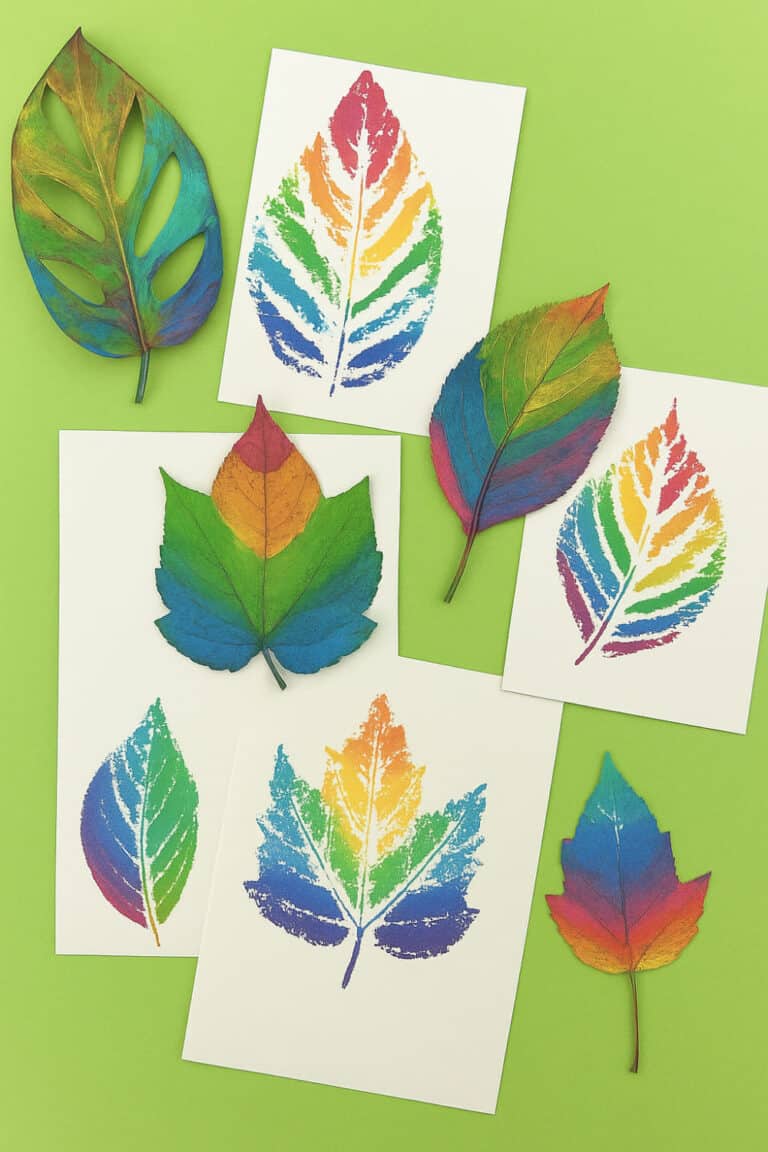
This is such a fun and vibrant summer craft that lets you turn real leaves into colorful works of art.
It’s simple enough for little kids, but the end result is so pretty that older kids (and even you!) will love making them too.
All you need are a few paint markers, some leaves, and paper to get started.
Materials:
- Real leaves (flat ones with deep veins work best)
- Watercolor or thick art paper
- Paint markers (rainbow colors or any set you have on hand)
Instructions:
1. Paint the leaves
Use your paint markers to color inside the veins of the leaf—focus on the center parts and avoid the outer edges. Try rainbow stripes, alternating colors, or your own pattern.
2. Press onto paper
Place the painted side of the leaf onto your watercolor paper. Press down evenly all over to make sure the paint transfers clearly.
3. Lift and reveal
Slowly peel the leaf off the paper and you’ll reveal a gorgeous, colorful leaf print with all the fine vein details.
4. Touch up if needed
If any areas didn’t transfer, you can add more paint to that part of the leaf and press it down again. Or just use your marker to fill it in directly on the paper.
6. Nature Frames

This simple nature frame is a great way for kids to turn their favorite finds from a nature walk or camp trip into a one-of-a-kind keepsake.
With just a piece of thin cardboard and some glue, you can help them build their own mini masterpiece filled with leaves, stones, shells, and anything else they gather along the way.
Materials:
- Thin cardboard or paperboard (like a cereal box)
- Glue (school glue or tacky glue)
- Optional: mounting putty to help place items before gluing
- Optional: hot glue gun for faster bonding
- Nature treasures (leaves, shells, pebbles, sticks, berries, etc.)
Tools:
- Scissors
- Bag or container for collecting items
Instructions:
1. Go on a nature walk
Head out with your kids and give them a small bag, container, or basket to collect anything that catches their eye—flat rocks, snail shells, fall leaves, seed pods, tiny twigs, or dried flowers.
2. Prep your board
Cut a rectangle from a piece of cereal box or similar thin cardboard. This will be the base of your collage. You can also cut thin strips from the same cardboard or use natural materials (like twigs or straws) to create a frame around the edge.
3. Arrange the treasures
Before gluing, have the kids arrange their items on the cardboard until they like how it looks. You can use mounting putty to temporarily hold the items in place while they plan their layout.
4. Glue it down
Once they’re happy with the design, glue each item in place. For heavier items like rocks or shells, a hot glue gun (with adult supervision) can be helpful. Let everything dry completely.
5. Optional frame
You can finish it off by gluing four sticks or straws around the edge as a rustic frame. This gives it a fun, polished look.
7. Nature Creatures
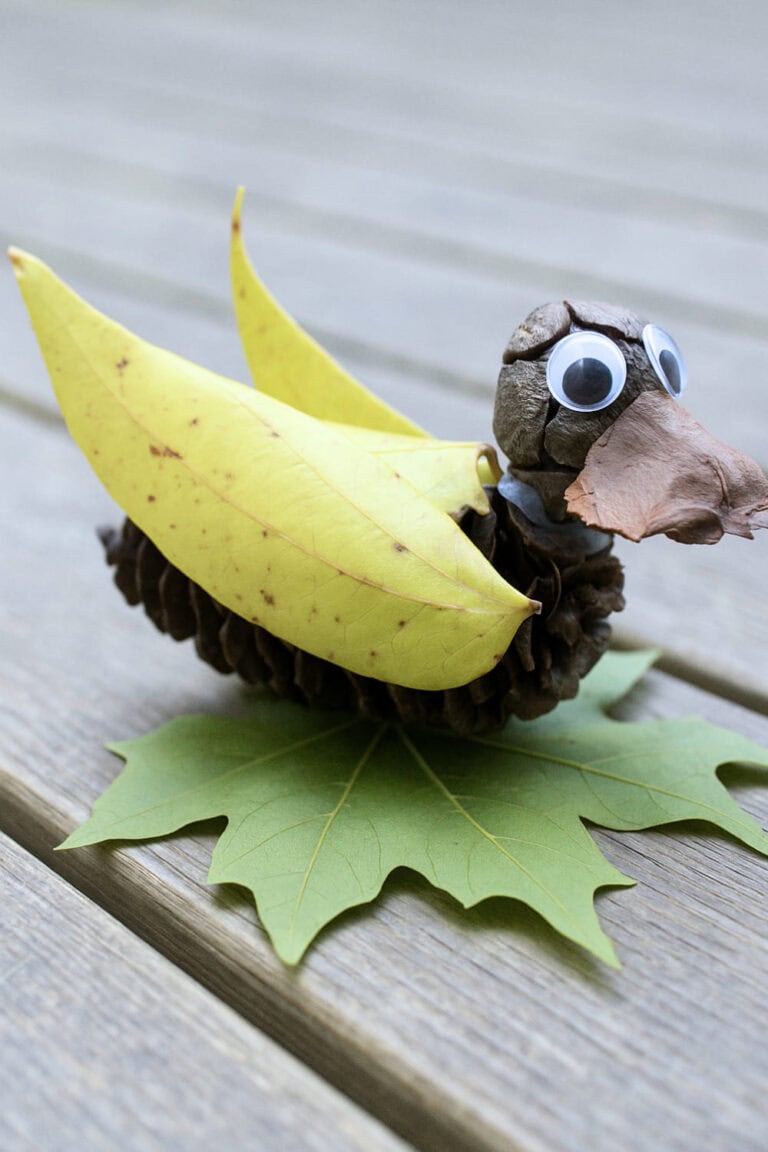
This cute duck made from pinecones, leaves, and seed pods is a perfect example of what you can build with a DIY nature craft construction set.
It’s a fun, eco-conscious craft that encourages imagination and open-ended play, plus, every duck will look totally unique depending on what nature treasures you’ve collected!
Materials:
- Pinecone (for the duck’s body)
- Round seed pod or nut (for the head)
- A wide leaf (for the wings)
- A flat, curled leaf or petal (for the beak)
- Large leaf (for the base or “feet”)
- Googly eyes (or printable paper eyes)
- Blu-tack, sticky tack, or glue (to attach pieces)
- Optional: a tray to hold all your collected nature items
Instructions:
1. Gather your nature treasures
Head outside and collect a mix of pinecones, seed pods, twigs, leaves (both fresh and dried), petals, stones—anything interesting! Make sure your pinecone is sturdy enough to act as the duck’s body.
2. Build the duck’s body and head
Take your pinecone and attach a small round seed pod to one end using sticky tack or glue—this will be the duck’s head.
3. Add the beak
Choose a small, slightly curled leaf or flat petal to act as the beak. Tuck or glue it under the head (seed pod) so it juts forward like a real duck bill.
4. Stick on the eyes
Attach googly eyes (or eco-friendly paper eyes) to the seed pod to bring your duck to life. Sticky tack makes this easy to adjust.
5. Make the wings
Use two long, curved leaves to create the duck’s wings. Secure them gently to the sides of the pinecone, angled upward or outward.
6. Set it on a leaf base
Place the finished duck on a large green leaf as a final touch—this acts as the duck’s feet or simply a display base.
8. Fun Twig Art
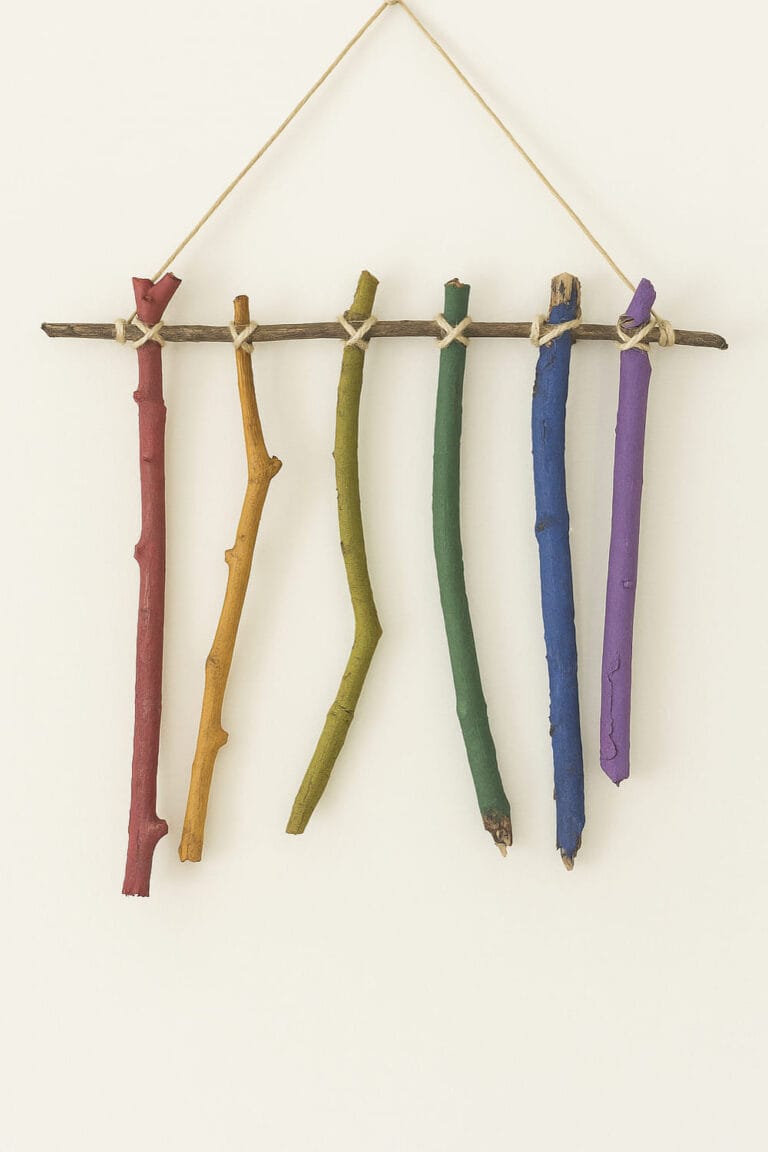
This colorful twig wall hanging is such a fun way to mix nature and creativity.
It’s great for decorating a playroom, classroom, or any space that could use a little color—and it’s an easy project to do with kids using items you probably already have at home or in your backyard.
Materials:
- Twigs (1 for each paint color + 1 extra for the top hanger)
- Acrylic or craft paints (choose your favorite palette—rainbow, pastels, neutrals, etc.)
- Paintbrushes
- Hot glue gun
- String, hemp cord, or twine (for wrapping and hanging)
Instructions:
1. Paint the sticks
Start by giving each stick a solid coat of paint. If kids are helping, make it easy by giving them one stick, one color, and one brush at a time. Set the painted sticks aside to dry completely.
2. Lay out your design
Once dry, place your painted sticks in a row underneath your unpainted stick (this one will act as the top support). Line them up in your desired color order and trim the bottoms if needed so they hang at a similar length.
3. Attach with hot glue
Use a hot glue gun to secure each painted stick to the unpainted top stick. You can glue them directly in place and then reinforce by wrapping string around the joints. Flip the piece over and add extra glue to the backs for extra hold.
4. Add a hanging cord
Cut a piece of string or hemp and glue or tie it to each end of the top stick so your art is easy to hang.
9. Campfire Nature Craft

Learn how to make this cute mini campfire craft using natural materials you can find outdoors. It’s not only a fun and creative project, it also doubles as a simple counting and learning activity for young kids.
Perfect for summer days, camping themes, or just some imaginative backyard play!
Materials:
- 10 small rocks
- A piece of cardboard
- Twigs that you can cut or snap into 10 smaller pieces
- A bunch of small leaves (or colored paper)
- Red or orange paint (optional)
- Glue
- A marker or pen
Instructions:
1. Collect your supplies
Head outside with your child and gather 10 small rocks and a few twigs. You’ll also want to collect some small leaves or petals for the flames.
2. Cut the base
Have a quick chat about flat shapes like circles, squares, or triangles. Let your child choose one, then cut your cardboard into that shape to act as the base for your mini fire.
3. Number your rocks
Ask a grown-up to help write numbers 1 through 10 on each rock. Mix them up and then glue them around the edge of the cardboard in the correct order—say the numbers out loud as you go!
4. Count and cut twigs
Pick a long twig (or two) and talk about size and length. Cut or break it into 10 small sticks. Count each piece to make sure you have enough.
5. Build your campfire
Add glue to the center of the cardboard and arrange the twig pieces like firewood.
6. Create the flames
Paint your leaves in red, orange, or yellow tones, or skip the paint if you’ve found bright leaves naturally. Once dry, crumple or layer them slightly and glue them on top of the twigs to look like a little flame.
10. Rock Painting
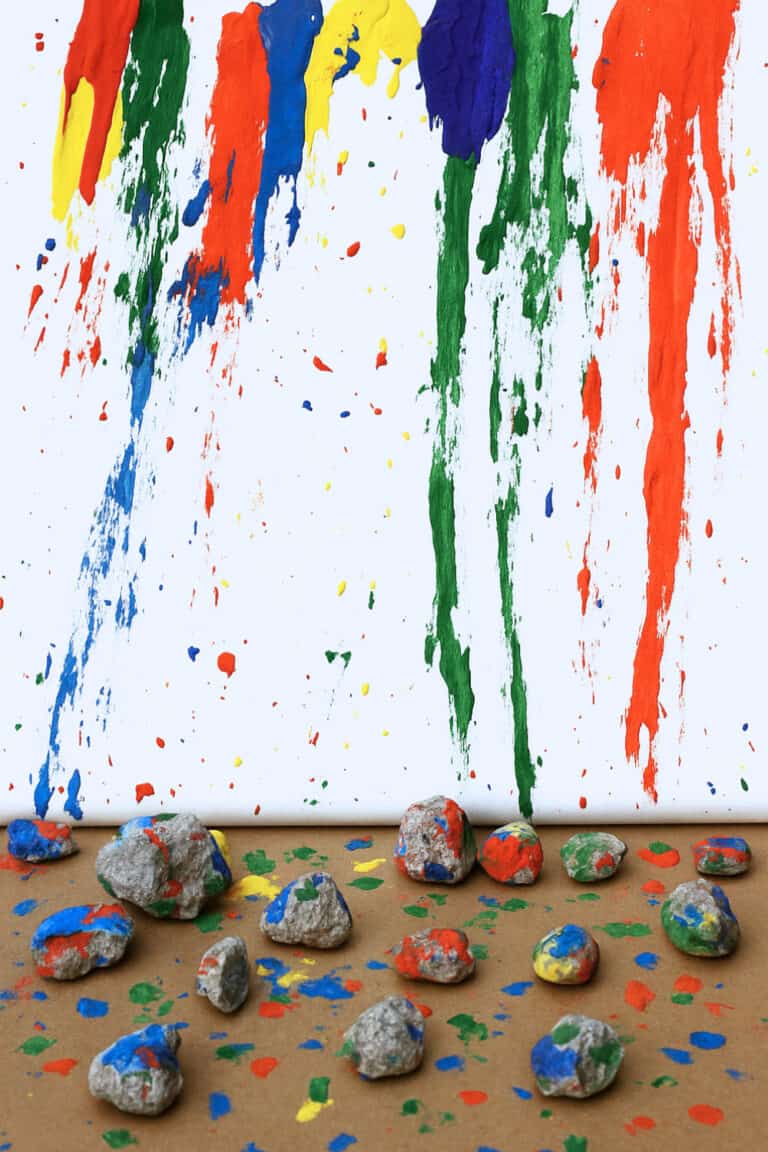
This big, messy, and colorful activity is a fun way to explore art and science at the same time. It’s perfect for outdoor play, group collaboration, and introducing kids to movement, gravity, and textures, all through rolling painted rocks!
Materials:
- Large piece of white paper or sturdy cardboard (poster board or packing paper)
- Washable paint in various colors
- Paintbrushes or squeeze bottles (optional)
- A folding table (or similar surface that can be tilted)
- A picnic table or another prop to create an incline
- A large bin of small to medium-sized rocks
- Bowls or containers for individual rock sets
- A piece of cardboard or tarp for the “landing pad”
- Tape (to secure paper to the table)
- Optional: smocks or old clothes (it gets messy!)
Steps:
1. Set up your painting surface
Tape your large sheet of paper or cardboard securely to a folding table. Prop the table at an angle using something sturdy (like a picnic table) to create a ramp for the rocks to roll down.
2. Place the landing pad
Set a large piece of cardboard or a tarp underneath the bottom of the ramp to catch rocks after they roll down. This helps keep them from getting lost in grass or dirt.
3. Prep the rocks
Gather a big bin of rocks, and then give each child their own bowl of rocks to use. This gives them space and helps with clean-up and collection later.
4. Practice rolling
Before adding paint, let kids practice rolling, sliding, or gently tossing the rocks down the paper. Talk about motion, gravity, and different speeds and angles. Use this time to review safety and taking turns collecting the rocks together.
5. Add the paint
Once everyone is comfortable, squirt or brush small blobs of paint along the top of the paper—one color per section or mixed together. Then let the kids roll their rocks through the paint and down the paper. Watch as the rocks create colorful trails and splatters!
6. Continue the process
Keep adding more paint as needed and take breaks to gather rocks at the bottom. Kids can reuse the same rocks over and over.
7. Let it dry
Once you’re done, let the paper dry completely. Remove any stuck-on rocks, and then hang the artwork proudly—indoors or out!
11. Nature Bugs
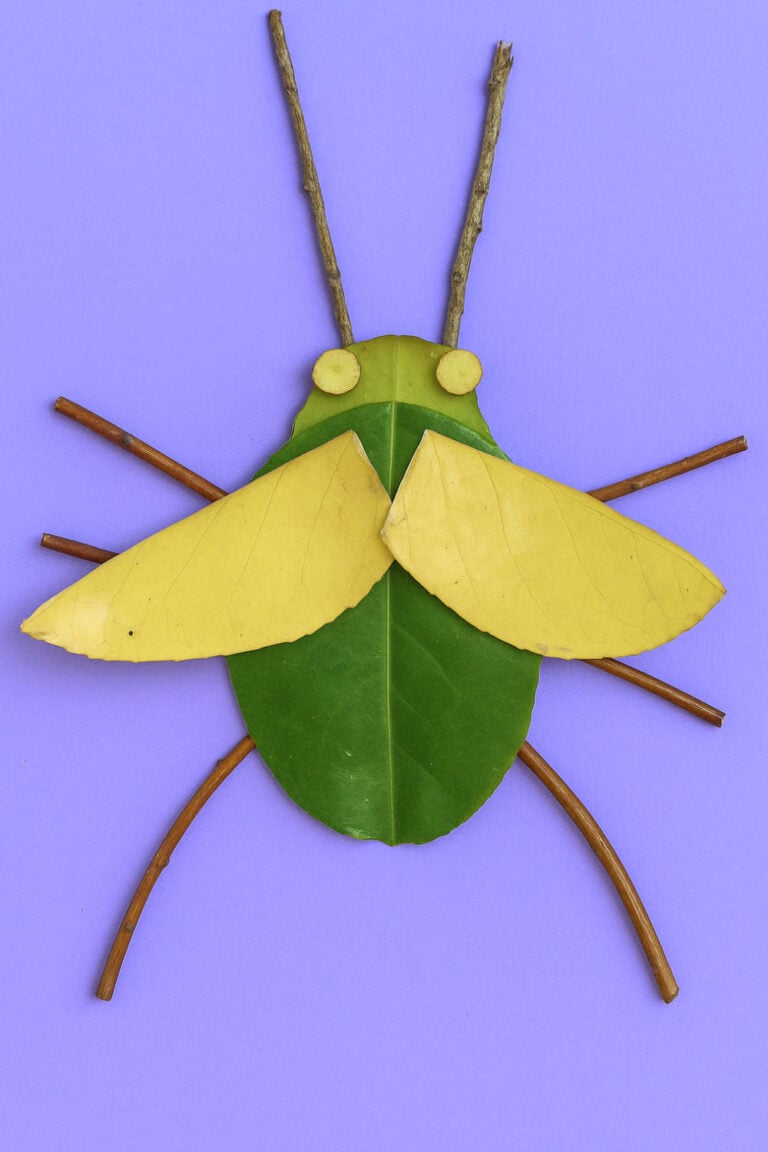
This creative craft combines painting, nature play, and recycled materials to help kids create their own imaginative insect artwork.
Perfect for an afternoon of outdoor fun and indoor crafting!
Materials:
- Heavy cardboard cut into squares (recycled from boxes – doesn’t need to be perfect)
- Acrylic paint (any color for the background)
- Paintbrush
- Tacky craft glue (stronger than ordinary glue) or blu-tack as an alternative
- Mod podge (for sealing the final piece)
- Hole punch (for making eyes)
- Leaves, sticks, and twigs from the garden – in various shapes and sizes
Steps:
1. Paint the cardboard base
Use acrylic paint to paint your cardboard square. Let it dry completely before moving on. This will be the background of your insect artwork.
2. Design your insect
Lay out different nature items on the painted square to create an insect shape. Try using a big leaf for the body, smaller leaves for wings, and twigs for legs or antennae. Move things around until you’re happy with the design.
3. Glue everything down
Carefully remove each item one by one and glue it in place using tacky craft glue. Blu-tack can work in a pinch, but tacky glue holds better, especially for heavier pieces.
4. Add details
Punch a hole in a leaf and use the little circle as an eye—or find a naturally round seed or leaf for this part. Add it to your insect’s head.
5. Seal with mod podge
Once your glue has dried, paint a layer of mod podge over your entire insect to help everything stay in place and give it a finished look.
12. Flower Nature Activity
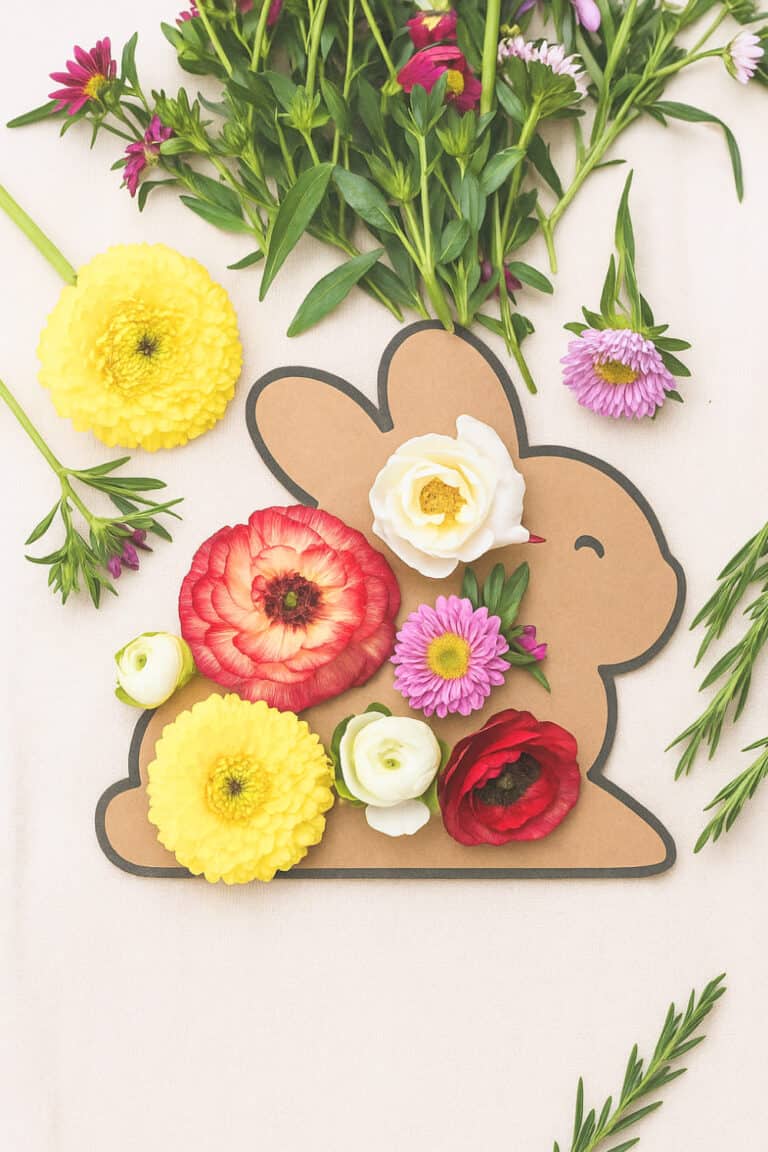
Let your kids turn nature into art with this easy flower animal craft using cardboard and fresh blooms. It’s a hands-on way to get creative after a nature walk, using flowers and leaves to decorate cute animal shapes!
Materials:
- Fresh leaves, flowers, herbs, or greenery (collected from outside)
- Cardboard (reuse old boxes or packages)
- Scissors
- Black marker
- (Optional) Hot glue gun for long-term display
- (Optional) Phone or camera to snap photos
Instructions:
Step 1: Create the Animal Shapes
Cut cardboard into animal shapes like bunnies, foxes, owls, or dinosaurs. Fold the cardboard in half before cutting to make symmetrical animals easier.
Step 2: Add Details
Use a black marker to outline the edges of your animals. Add features like eyes, whiskers, beaks, or tails to give them personality.
Step 3: Decorate with Nature
Let your kids arrange and layer the flowers and greenery over each animal shape. Encourage creativity—use yellow petals for feathers, or tiny buds for scales or fur.
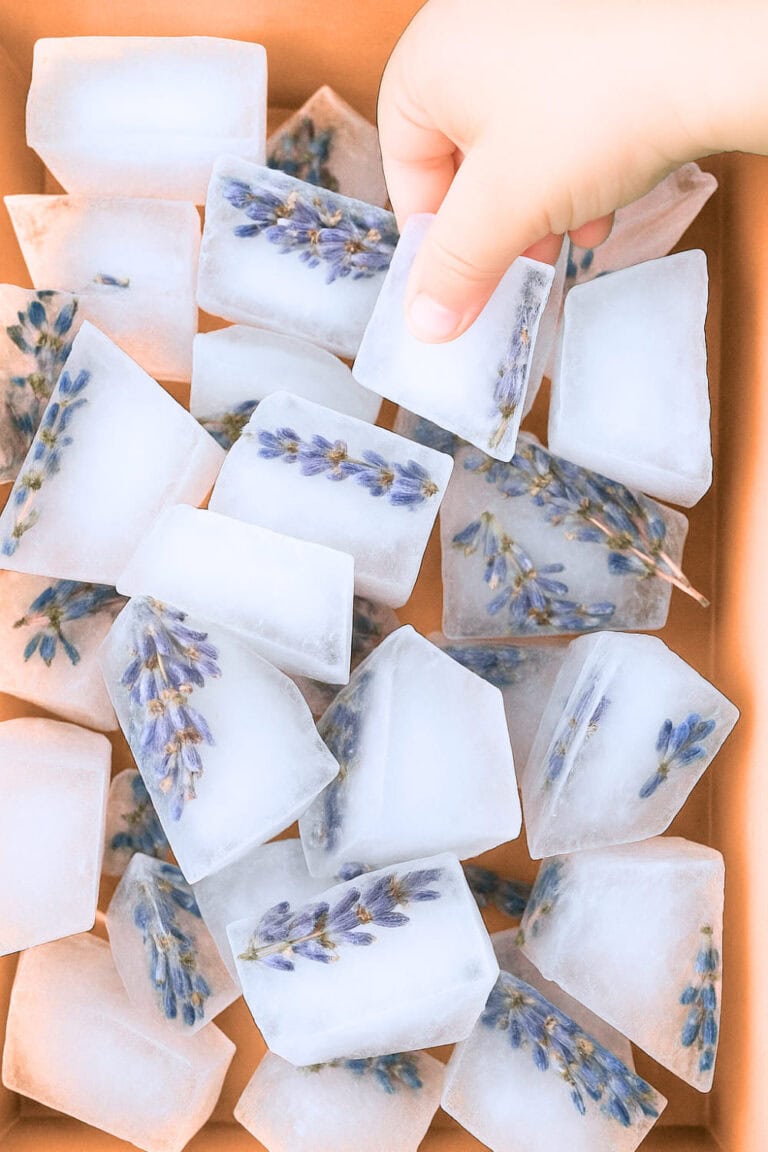
13. Lavender Ice Cubes
14. Summer Shell Wreath
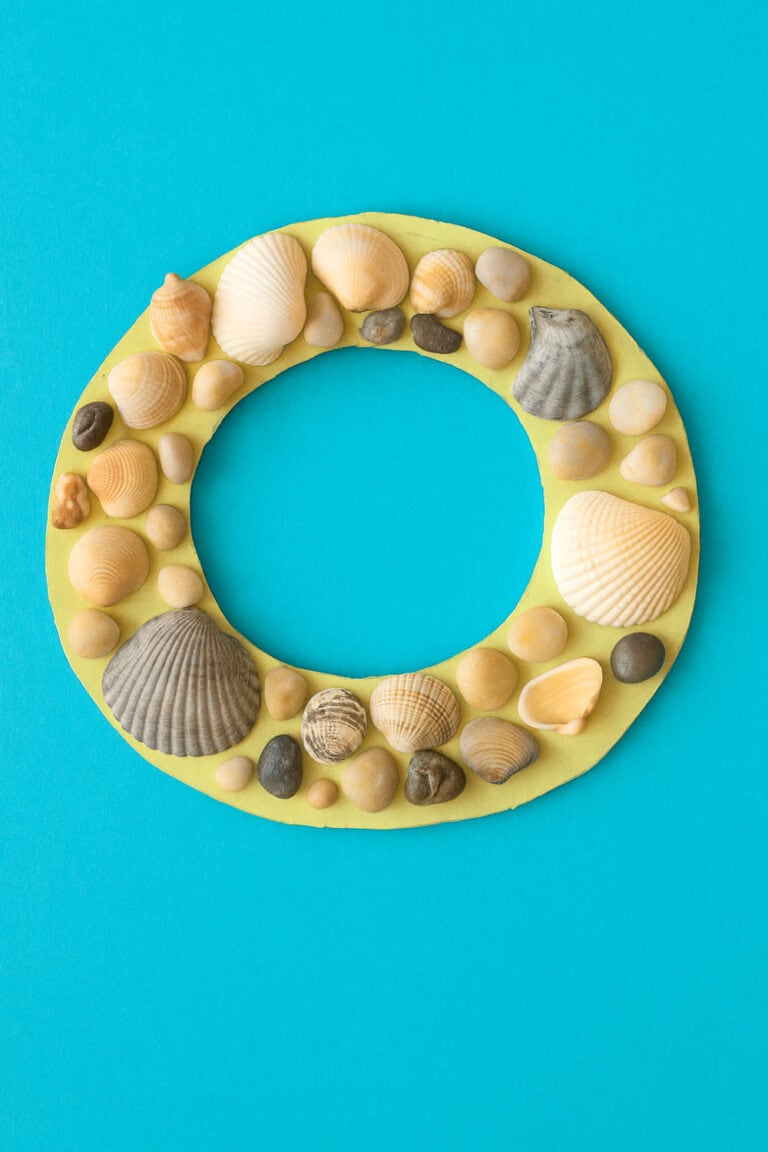
Turn your beach finds into a cute DIY seashell wreath that kids will love making. It’s the perfect summer craft to remember your seaside adventures and get creative with natural textures!
Materials:
- Cardboard
- Yellow paint or paper
- Seashells and small beach pebbles
- Glue
- Scissors
Steps:
- Cut a ring shape out of cardboard to form the wreath base.
- Paint or cover it with yellow paper and let it dry.
- Arrange seashells and small stones around the ring, then glue them down.
- Let it dry completely and hang it up as a beachy summer decoration.
15. DIY Terrariums
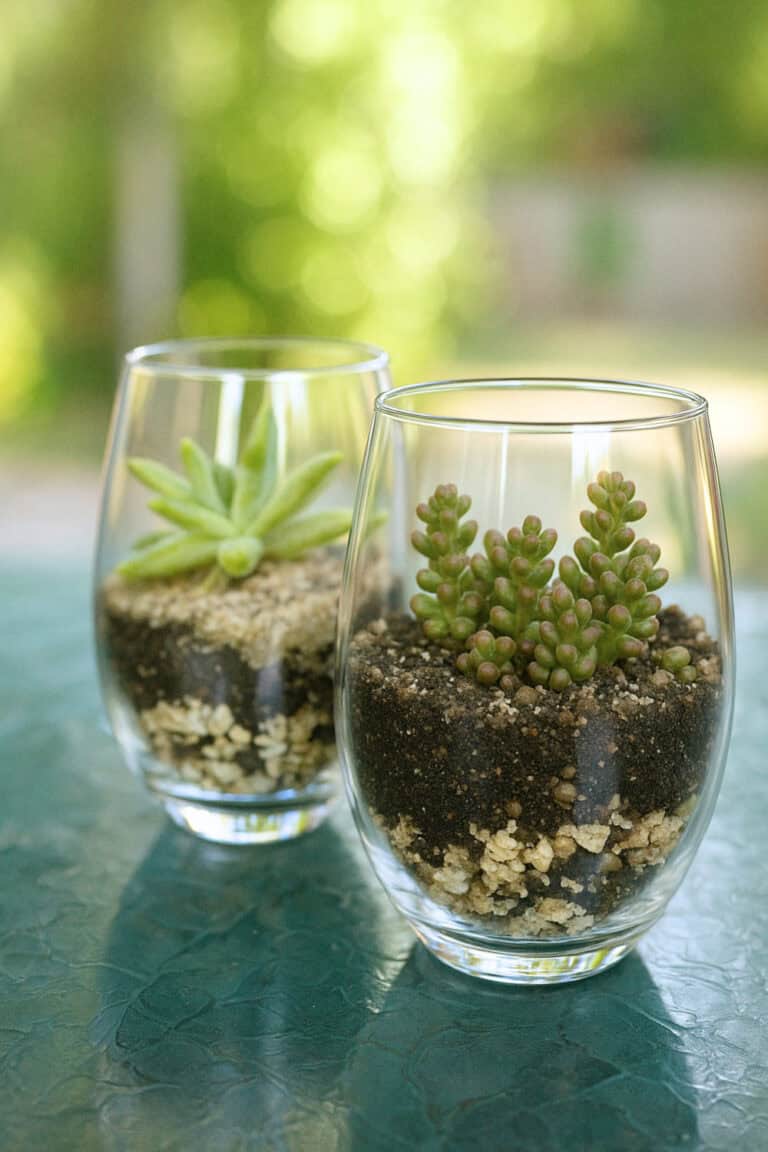
Making a succulent terrarium for a kid summer activitiy is an easy and fun way to bring a little greenery indoors.
It’s the perfect hands-on activity for kids or adults who love plants and simple DIYs.
Materials:
- Clear glass cup or stemless wine glass
- Small gravel or pebbles
- Cactus/succulent potting mix
- Succulents
- Sand
- Decorative rocks or mini landscape pieces
Steps:
- Start with drainage – Pour a layer of small gravel into the bottom of the glass. This keeps excess water away from the roots.
- Add soil – Spoon in a layer of cactus or succulent potting mix right over the gravel.
- Prep the plant – Gently remove the succulent from its plastic container. Brush off some of the old soil so the roots are more visible.
- Plant it – Nestle the succulent into the potting mix and gently press soil around the roots to keep it in place.
- Top with sand – Sprinkle a thin, even layer of sand on top of the soil for a clean finish.
- Decorate – Place small rocks, shells, or other decorative items on top to personalize your terrarium.
More Nature-Inspired Summer Crafts and Activities for Kids and Preschoolers
If you need more summer activities for your kids, check out this list of even more nature-inspired crafts.
16. Pressed Flower Bookmarks
Press flowers in a heavy book for a few days, then glue them onto cardstock. Cover with contact paper or laminate to make beautiful summer bookmarks.
17. Nature Paintbrushes
Tie flowers, leaves, and grass to the ends of sticks to create your own brushes. Dip them in paint and let kids explore different textures on paper.
18. Flower Crowns
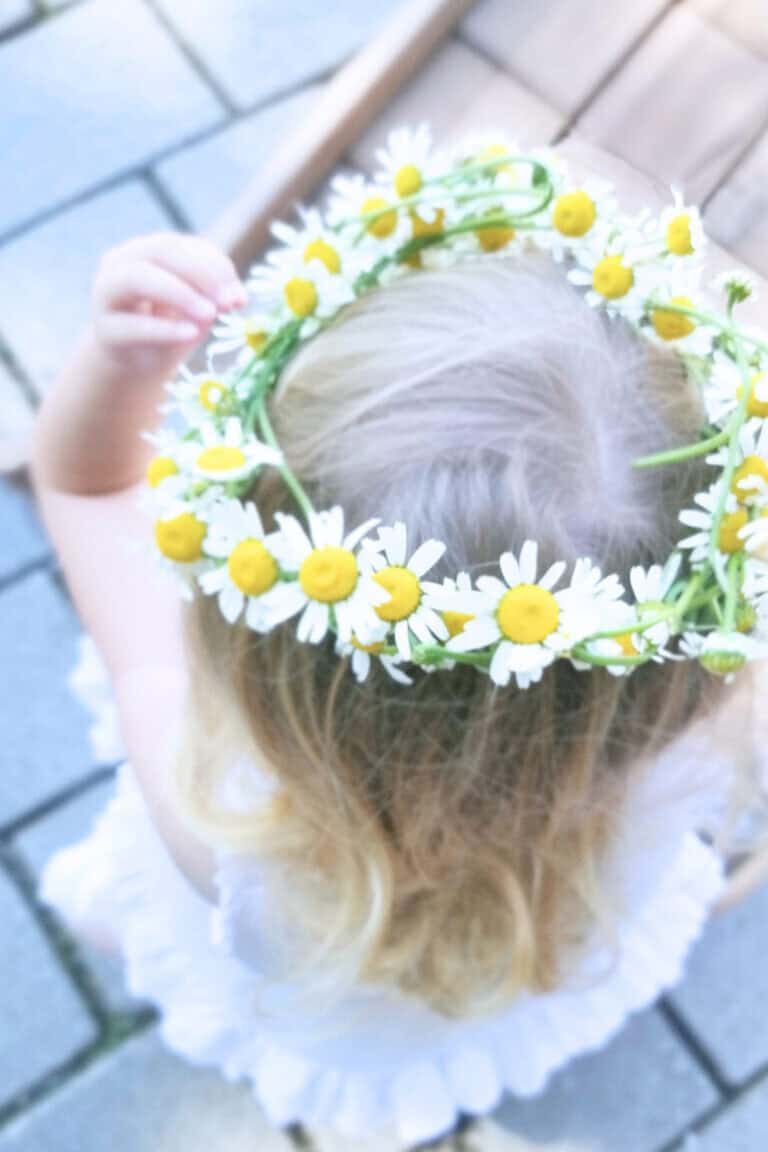
Make a simple flower crown by twisting floral wire into a circle and wrapping fresh flowers and leaves around it. Use floral tape to secure everything.
19. Sand Nature Prints
Press leaves, shells, or flowers into damp sand to make pretty prints. Spray lightly with water to hold the design, or take a photo to save it.
20. Stick Maze or Letters
Use sticks to create a simple maze, shapes, or letters on a flat surface outdoors. Let little ones run toy cars through the paths or trace the letters.
21. Nature Soup
Fill a big tub or bowl with water and toss in flower petals, herbs, leaves, and even citrus slices. Give kids ladles and spoons to stir their pretend “soup.”
22. Sun Catchers with Nature
Use paper plates or clear contact paper to sandwich leaves, petals, and bits of grass. Hang in a sunny window to catch the light.
23. DIY Garden Markers
Paint rocks or craft sticks with plant names and decorate with flower or bug designs. Use them to label your garden or plant pots.
24. Shell Painting
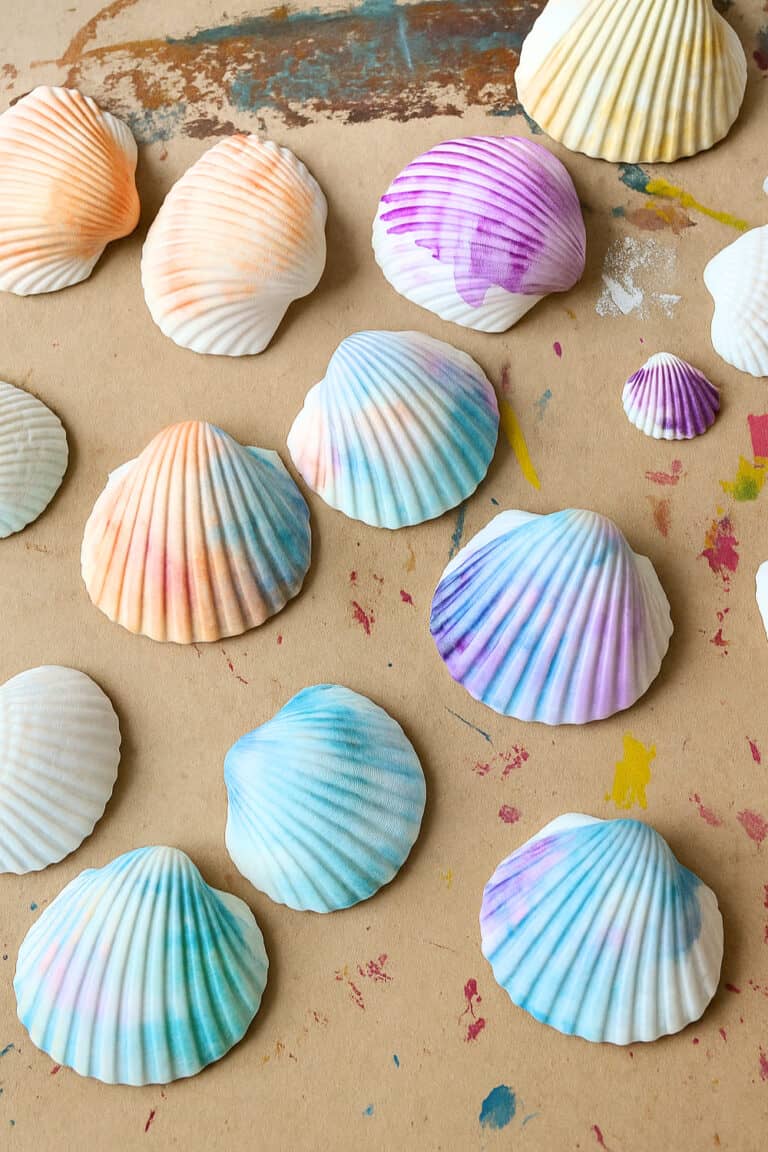
Collect shells from the beach and use paint pens or small brushes to decorate them with patterns, animals, or colors. They make great keepsakes or play pieces.
25. Mud Kitchen Fun
Set up an outdoor play kitchen with bowls, old utensils, and dirt or mud. Kids can mix in leaves, petals, and sticks to “cook” up nature dishes in the backyard.
26. Nature Scavenger Hunt
Create a checklist of natural items like “a red leaf,” “a smooth rock,” or “a feather.” Head outside and let kids find and collect each one to learn more about their environment.
27. Clay Nature Stamps
Flatten air-dry clay into small circles and press in textured leaves or flowers to leave an imprint. Let the clay dry, then paint the patterns for a fun nature keepsake.
28. Dandelion Painting
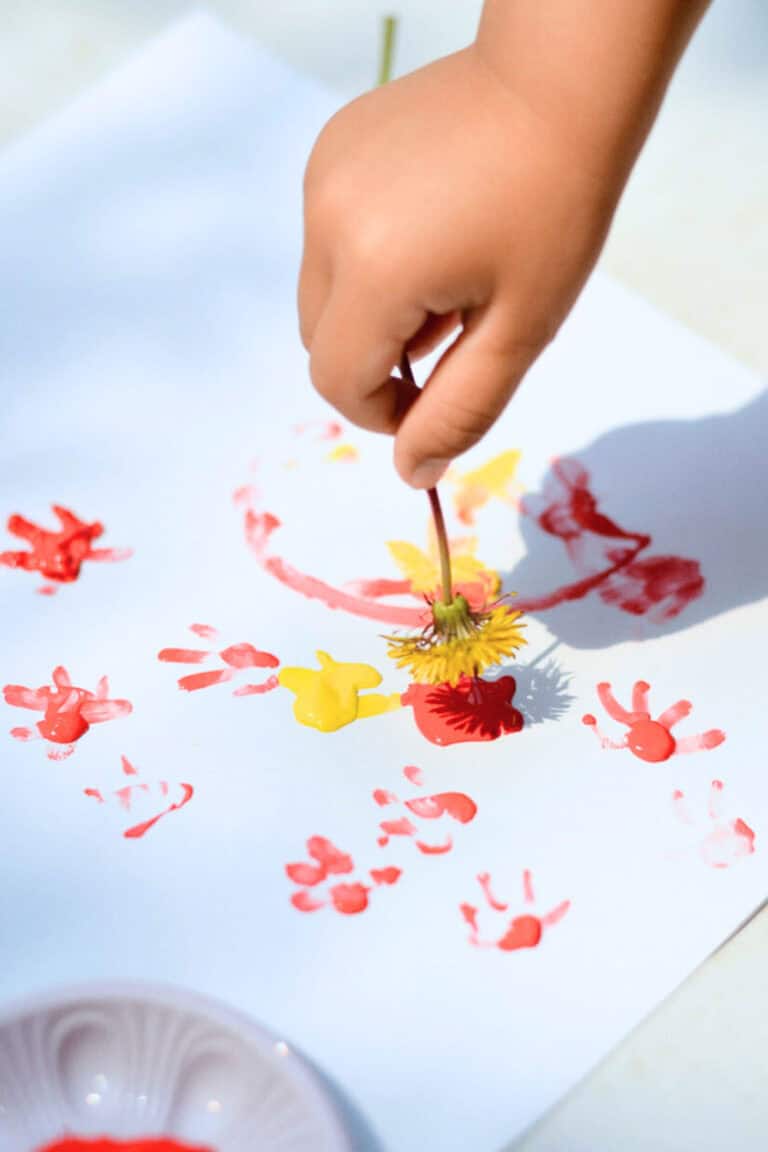
Use dandelions as paintbrushes by dipping the fluffy flower tops into paint. Stamp or swirl them across paper to make fun and messy art.
29. Mini Nature Gardens in Cups
Fill clear cups with layers of soil, moss, small plants, and tiny natural treasures. Add a small rock path or twigs to build a magical mini garden scene.
30. Petal Potions
Set up bowls of water and let kids add petals, herbs, and leaves to make pretend magic potions. Give them spoons, scoops, or funnels to stir and pour their creations.
31. Bark Rubbing Art
Take paper and crayons outside and hold the paper against different tree barks. Rub the crayon sideways across the paper to reveal fun textures and patterns.
Fun Times this Summer
I hope you found some fun nature-inspired activities for your kids this summer! If you need more help, check out my other ideas like science experiments to try, chalk ideas for toddlers and fun outdoor activities to set up.
Follow me on Pinterest for more kid activities and recipe ideas!

Leave a Reply